Implementing Authentication in your Next.js application using Clerk

SDE-1 @HashedIn by Deloitte | Passionate about Web and Mobile Development | 🌐 Turning ideas into digital solutions | #JavaScript #React #NodeJS #WebDev #Typescript #MobileDev 🚀
Introduction
Clerk Auth is a modern authentication and user management platform that aims to simplify the process of adding authentication and security features to web applications.
It provides developers with a set of tools and APIs to handle user registration, login, and account management, allowing them to focus on building their application's core functionality without getting bogged down by the complexities of user authentication.
You can do the following using Clerk:
Allow people to check in using their existing Google, GitHub, or other social network accounts.
Allow users to log in without a password by utilizing a one-time passcode (OTP) sent to their phone.
Control user accounts, responsibilities, and permissions from just one dashboard.
Using built-in Clerk features like session management and password security, you can secure your app.
Setting up clerk Auth in your Next.js project
Create a new Next.js project using
npx create-next-app@latest.Install the Clerk Auth SDK using
npm install @clerk/nextjs.If you do not have account on Clerk, you can visit Clerk website and sign up
After signing up, create a new application in it, give a name to your project. I am giving it
clerk-auth-with-next.Below the name section, you can choose the different providers that users can use to sign up and login on your website. I have choosen only Email and Google provider.
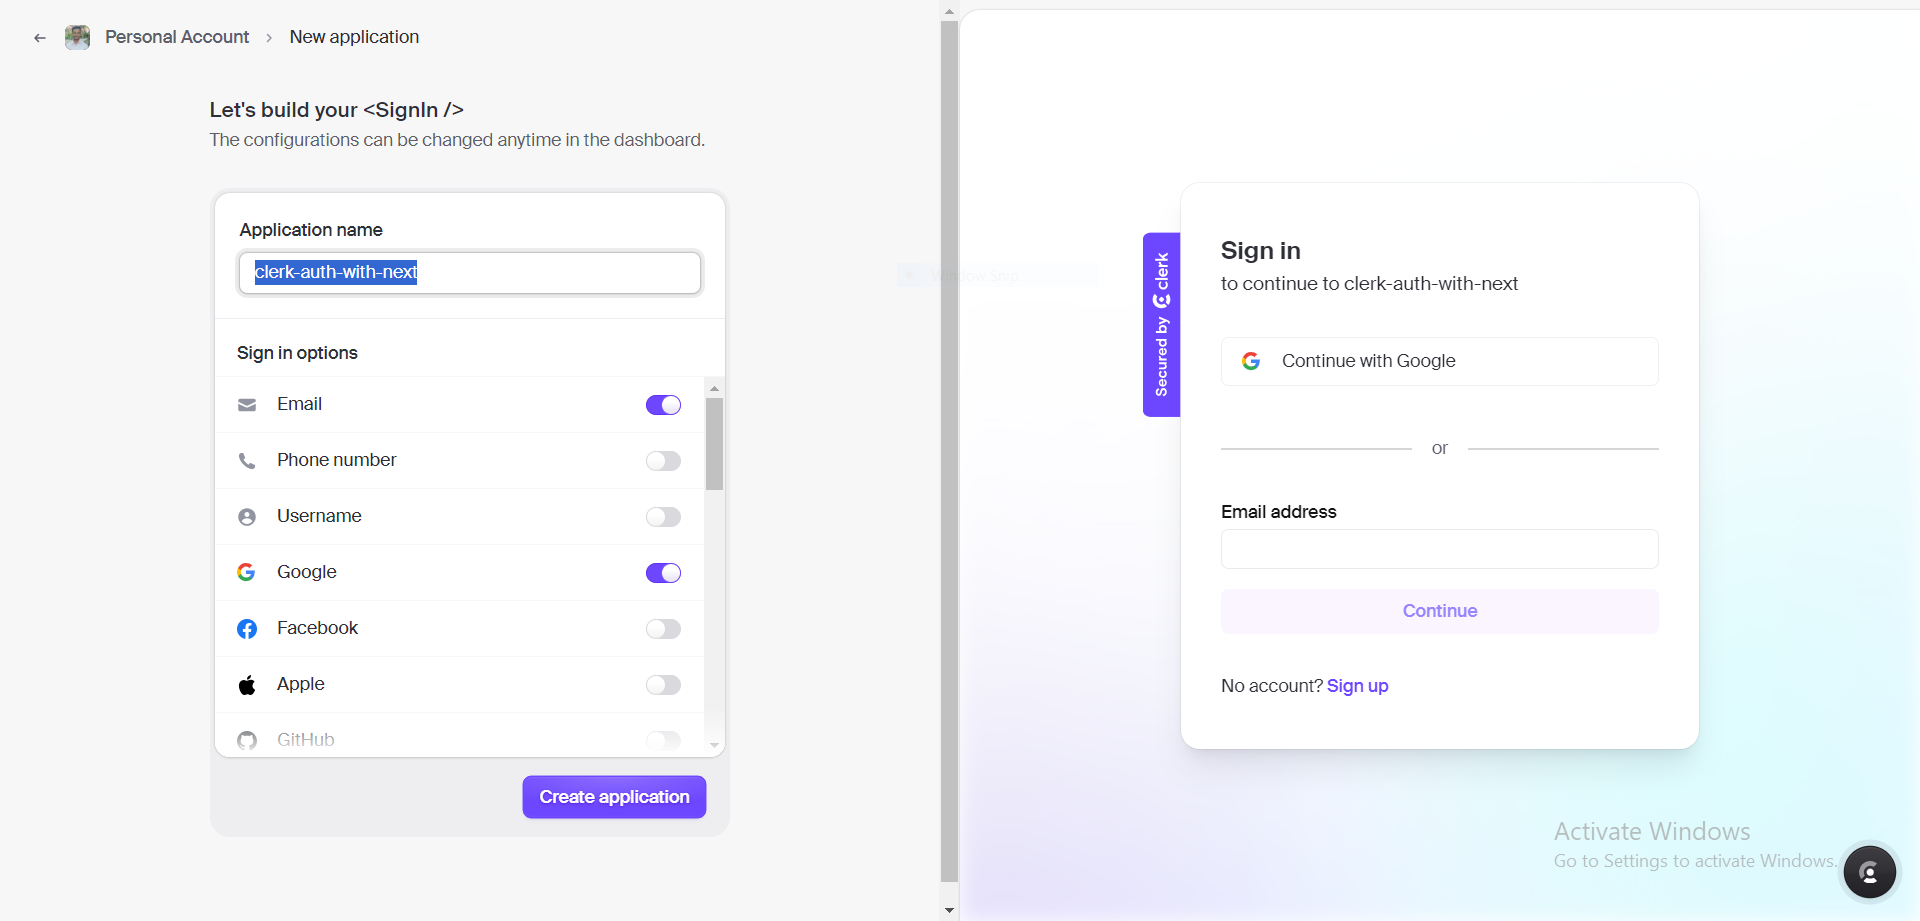
After completing these steps, click on "create application". It will take a couple of minutes to setup the dashboard for you.
On your Dashboard, you can see API keys, cant share a screen shot due to security purposes. Copy that API keys and paste in your .env file. and make sure to put .env in .gitignore file so that you dont accidently push it to github.
Wrapping you Next.js application with <ClerkProvider/>
This is a necessary step for you to carry out, without this authentication wont work.
Layout.tsx
import type { Metadata } from "next";
import { Inter } from "next/font/google";
import { ClerkProvider } from "@clerk/nextjs";

const inter = Inter({ subsets: ["latin"] });

export const metadata: Metadata = {
  title: "Create Next App",
  description: "Generated by create next app",
};

export default function RootLayout({
  children,
}: Readonly<{
  children: React.ReactNode;
}>) {
  return (
    <ClerkProvider>
      <html lang="en">
        <body className={inter.className}>{children}</body>
      </html>
    </ClerkProvider>
  );
}
Implementing Middleware for protecting Routes
Once you've integrated Clerk into your application, the next step is to determine which pages should be accessible to the public and which ones should require user authentication. This is achieved by creating a middleware.js file at the project's root and specifying which routes are public and which are private. In our specific scenario, we want only the home page to be accessible to the public, while the other pages should remain hidden until the user logs in to the application. You can accomplish this by implementing the following code:
middleware.ts
import { authMiddleware } from "@clerk/nextjs";

export default authMiddleware({
  publicRoutes: ["/", "/contact"],
});

export const config = {
  matcher: ["/((?!.+\\.[\\w]+$|_next).*)", "/", "/(api|trpc)(.*)"],
};
Implementing SignIn logic for our application
I have tried to keep our application, by keeping only the home page and a signIn page where you can access SignIn form
signin/page.tsx
import { SignIn } from "@clerk/nextjs";

export default async function Page() {
  return (
    <>
      <div
        style={{
          display: "flex",
          justifyContent: "center",
          alignItems: "center",
          height: "100vh",
        }}
      >
        <SignIn />
      </div>
    </>
  );
}
SignIn component is a pre-built login Form provided by Clerk to us. The form look something like this:

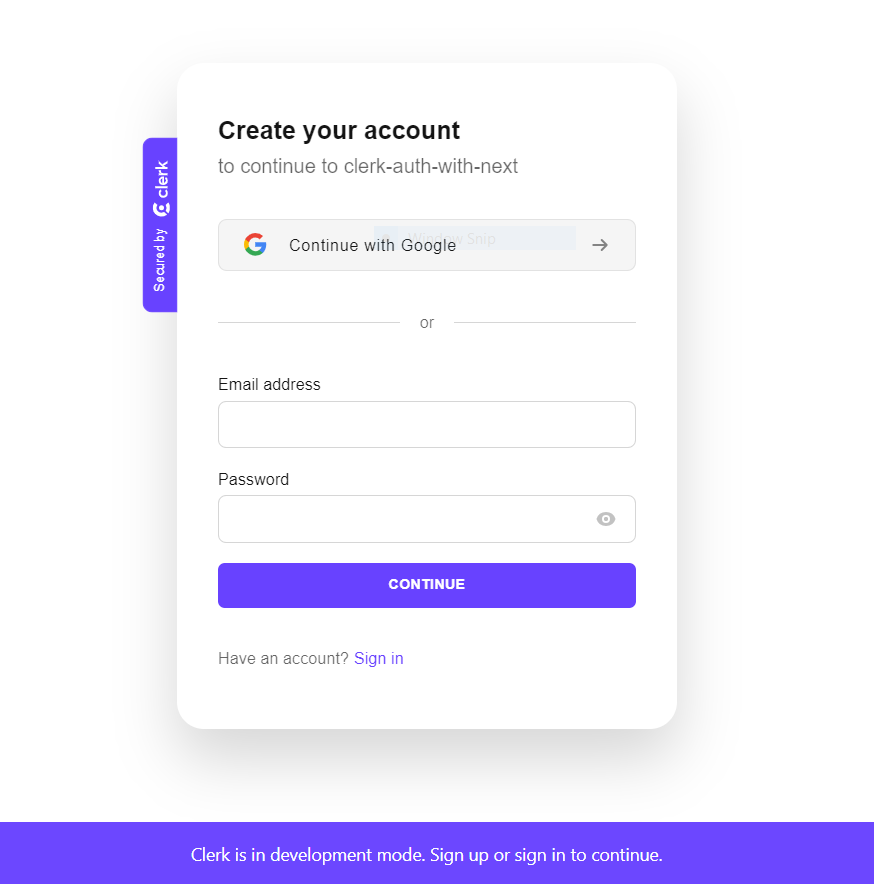
So this component, as we had give google and email providers. It gives us both of the options to login. If you want to Signup on the platform, you can click on Sign up button to sign up and again even, the sign up form is also give to us by clerk.
Accessing User Data and session
Once you finish with the signin process, the user is logged in. You can access user data using the currentUser function provided by clerk to you. Since we are now logged in we have to use SignedIn component given to us by clerk:
App.tsx
import { SignOutButton, SignedIn, SignedOut, currentUser } from "@clerk/nextjs";
import Link from "next/link";

export default async function Home() {
  const data = await currentUser();

  return (
    <>
      <SignedIn>
        <div
          style={{
            display: "flex",
            flexDirection: "column",
            justifyContent: "center",
            alignItems: "center",
            height: "100vh",
          }}
        >
          <h1>Hello, {data?.firstName}</h1>
        </div>
      </SignedIn>
    </>
  );
}
Signing Out an user
If you want to give an option to the user to SignOut from the application, then you can use the SignOutButton component given by clerk. When the user is logged out, you can give an option for the user to login again using SignedOut component given by clerk to us.
App.tsx
import { SignOutButton, SignedIn, SignedOut, currentUser } from "@clerk/nextjs";
import Link from "next/link";

export default async function Home() {
  const data = await currentUser();

  return (
    <>
      <SignedIn>
        <div
          style={{
            display: "flex",
            flexDirection: "column",
            justifyContent: "center",
            alignItems: "center",
            height: "100vh",
          }}
        >
          <h1>Hello, {data?.firstName}</h1>
          <SignOutButton />
        </div>
      </SignedIn>
       <SignedOut>
        <Link href={"/signin"}>Login here</Link>
      </SignedOut>
    </>
  );
}
Advantages of Clerk Authentication
Easy Integration
Seamless integration with popular web frameworks like Next.js, Remix, and Gatsby.Pre-built UI Components
Pre-built UI components to save development time.Robust Security
Features like secure password hashing, CSRF protection, and multi-factor authentication.Scalability
Designed to handle user authentication at scale, supporting millions of users.
Disadvantages of Clerk Authentication
Limited Customization:
Clerk Auth provides customizable UI components but has limited flexibility in modifying authentication flows and user interfaces, which can be challenging for unique designs or specific needs.
Dependency on Third-Party Service:
Using Clerk Auth saves development time but makes you reliant on their availability and performance. Downtime or performance issues could impact your application's authentication functionality.
Conclusion
This is the sixth blog in the Next.js Learning path series and if you want to read the previous blogs, then you can read them by clicking here. In the upcoming blogs I am planning to cover Next.js server actions, Integration with prisma and MongoDB, NextAuth and many more. If you are interested in such blogs, please make sure to subscribe to my newsletter.
To get access to the code that I have used above, click here. For any query, you can get in touch with me via LinkedIn and twitter. Leave all your comments and suggestions in the comment section. Let's connect and share more ideas.
Happy coding!


